We all know that the average life expectancy of a sailing boat is 40 years... A lot longer than that of its portlights! What slowly but surely destroys your ‘little windows’ is of course the sun. Not the winter sun, which is low on the horizon, but the scorching midday sun... Under the combined action of the phenomena of expansion and ultraviolet, the portlight deteriorates, crazes and sometimes breaks. As for the watertight joint, it more often than not ends up by letting in a few drops. The portlights most affected are the biggest ones, oriented at an angle close to the horizontal. The darker the panel, the more it is sensitive to ageing. The material generally used is polymethyl methacrylate, often abbreviated to PMMA. This polymer – also called Perspex, its first commercial name, is particularly resistant to UV, more transparent and above all, lighter than glass. On the other hand, it is sensitive to scratching, hydrocarbons and certain glues. Allow 100 euros for 1m² of 8mm thick Perspex. We also use polycarbonate – Lexan, for example. It is more scratch-resistant, but doesn’t take kindly to being screwed down tightly.
So, are you ready to fit your new portlights?
You can remove the old portlight for use as a template...as long as your boat is under shelter! On our Aventura 23, the starboard portlight disappeared, following a capsize when it ran aground. We transfer the measurements using wooden battens and clamps.
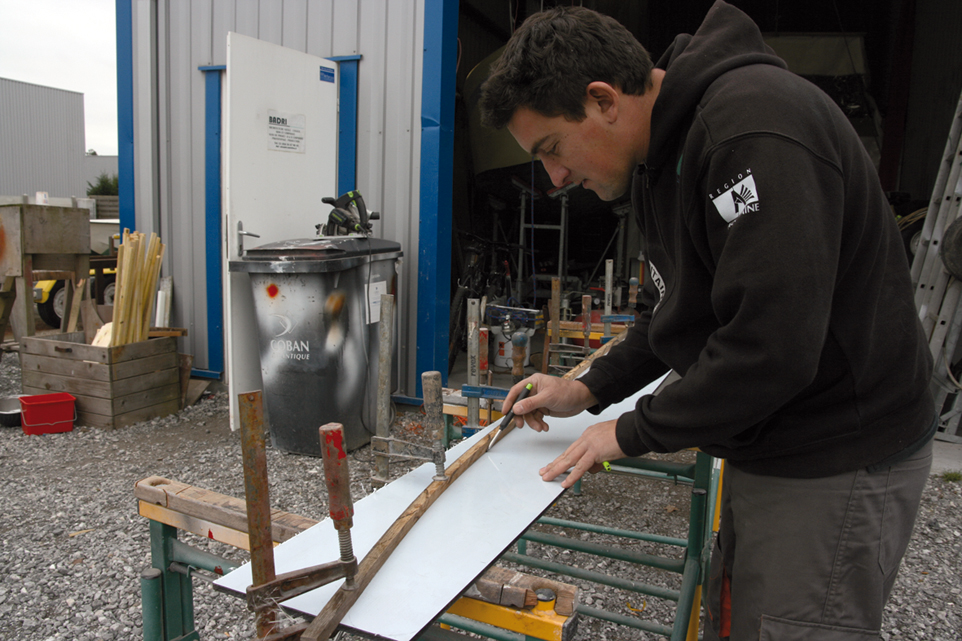
Ready for cutting! The film protecting both sides of the Perspex remains in place. We preferably use a circular saw for long lengths: the blade is adjusted to exactly the right thickness, here 8mm. No need to move the Perspex!
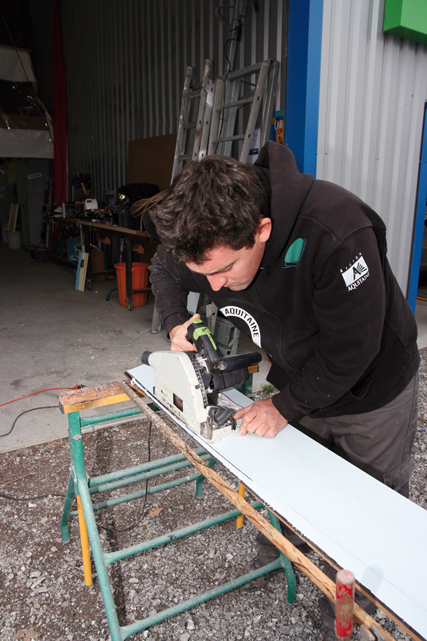
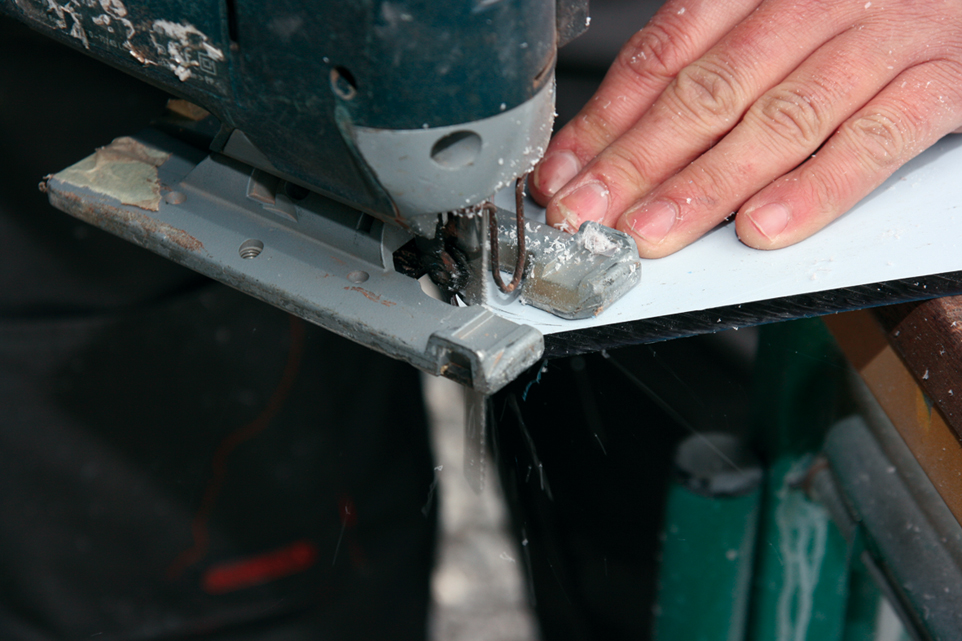
The front part of the portlight has a very tight curve: it is cut out with the help of a jigsaw, as are the rounded angles at the rear. Remember to immobilize your Perspex well.
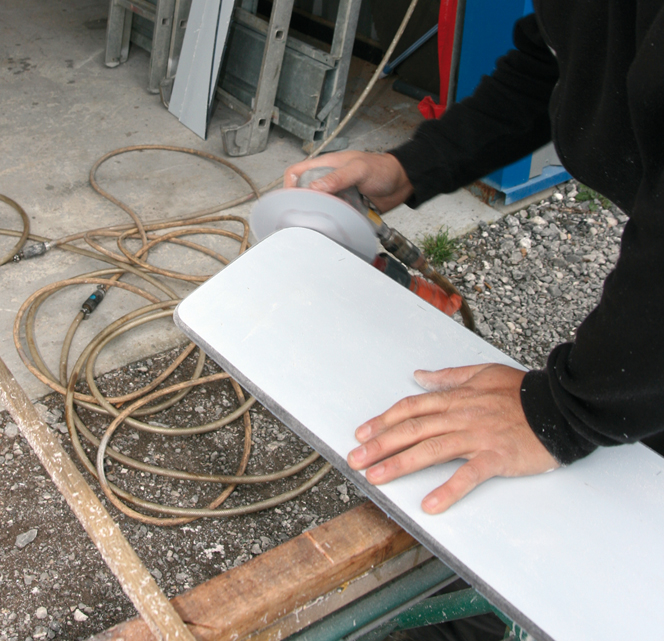
The upper edge of the portlight is rounded off with the help of an orbital sander. We use four different disks for an optimum finish: the grains used here are 80, 120, 220 and finally 500.
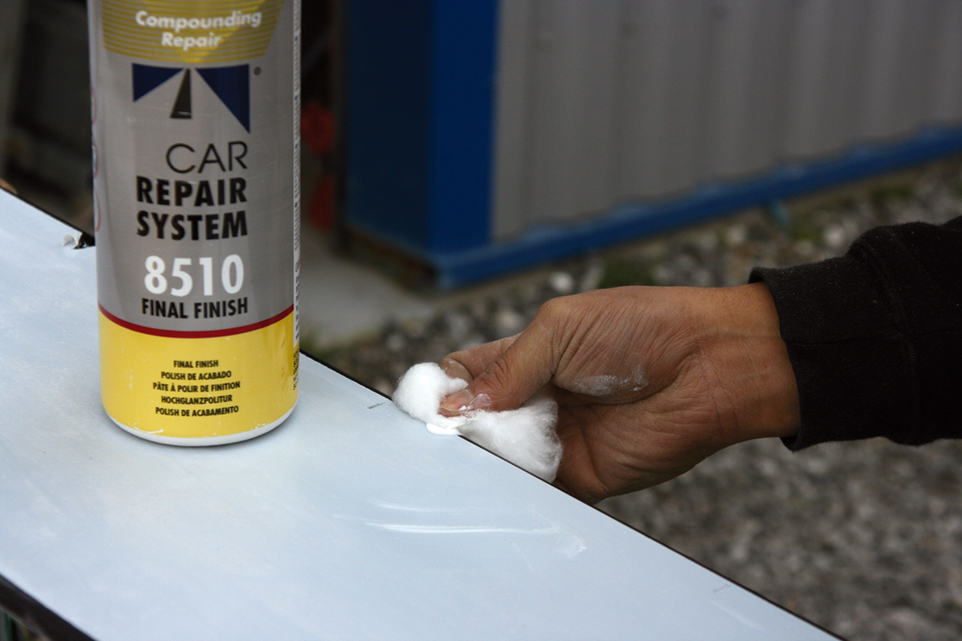
To obtain a good finish on the angles, we use a polishing paste. Products intended for cars are perfectly suitable. Polish well for a faultless shine
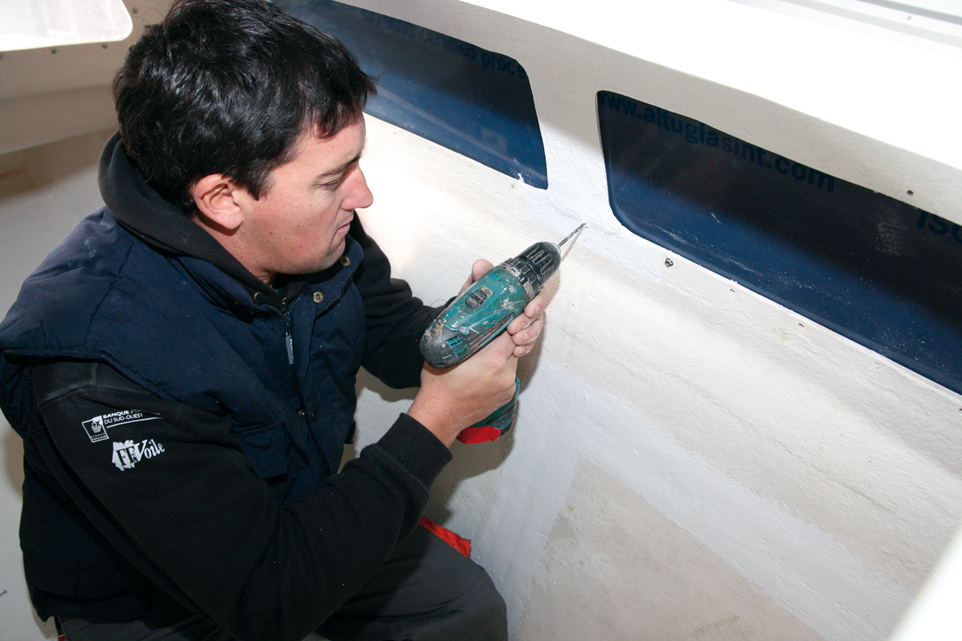
From now on, it’s best if there are two of you working! Equipped with portlight nuts (preferably in stainless – around 1 euro each; aluminum often proves impossible to dismantle), position the portlight, drill four holes from inside and fix it.
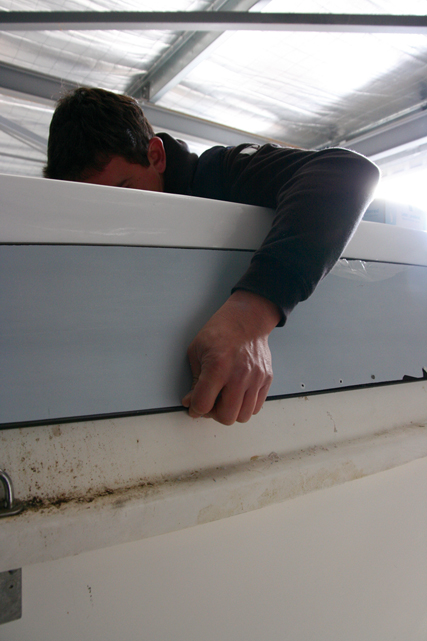
From inside, drill the Perspex, using the holes in the fiberglass as a guide. From outside, it's useful for your helper to press hard on the Perspex to make drilling it easier...but be careful of his or her hands!
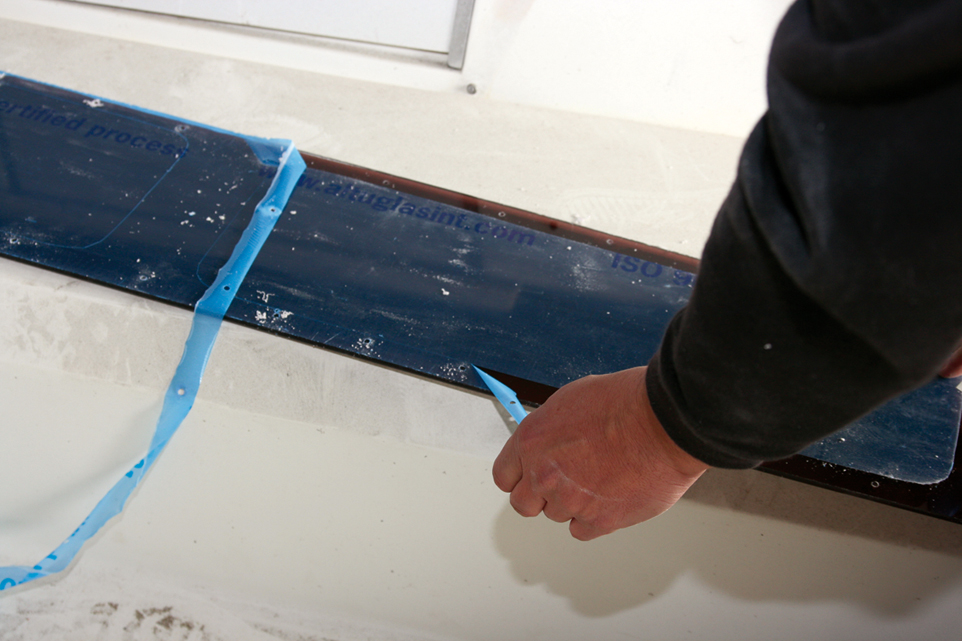
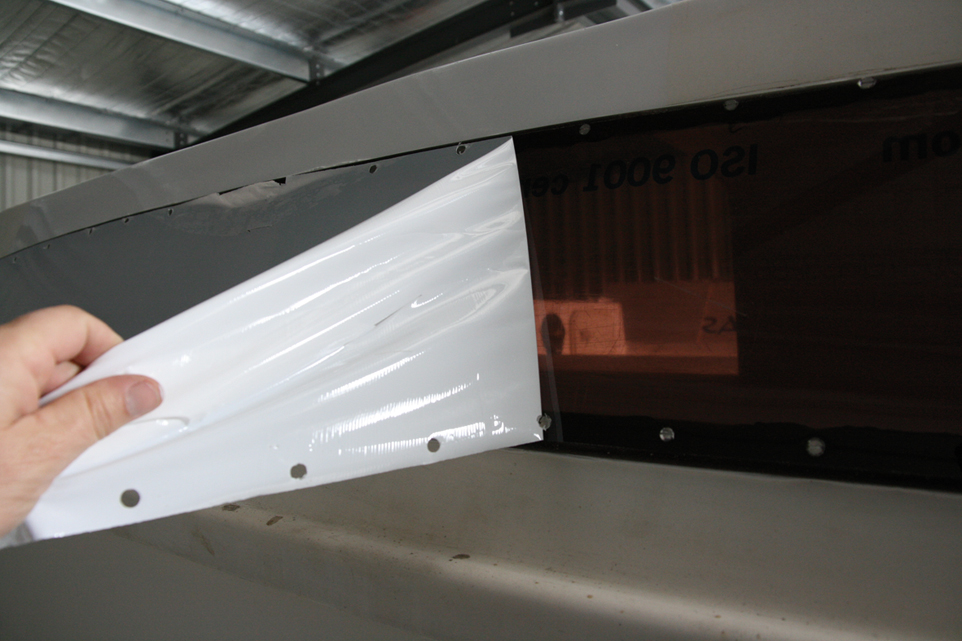
Before dismantling the portlight, run a Stanley knife along the interior angles: it will thus be easy to remove the protection from the joint contact area. The other parts will remain protected by the film.
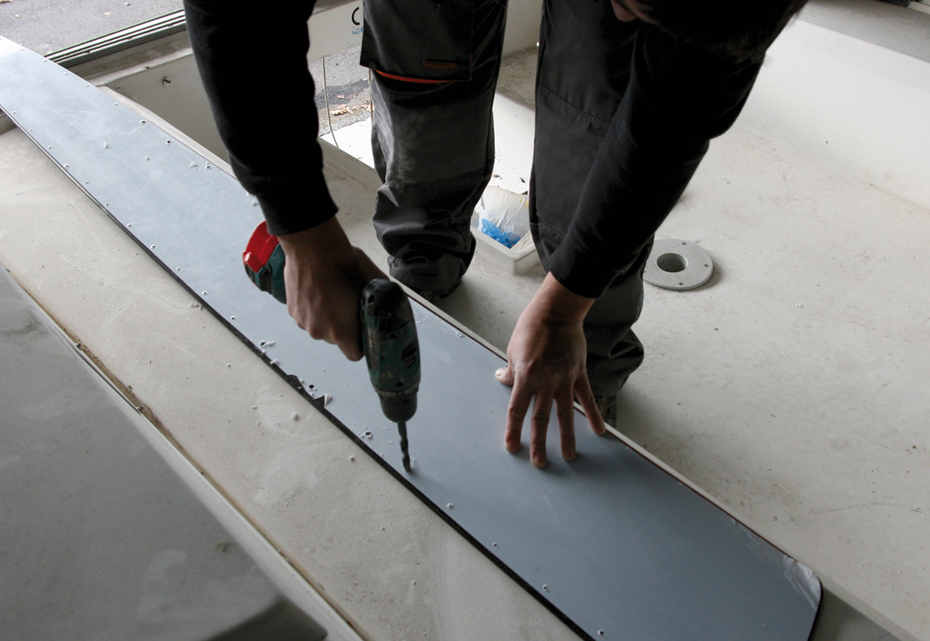
On the outside of the portlight, countersink each hole with a drill bit of the same diameter as the bolt heads. The latter will thus be perfectly flush with the portlight.
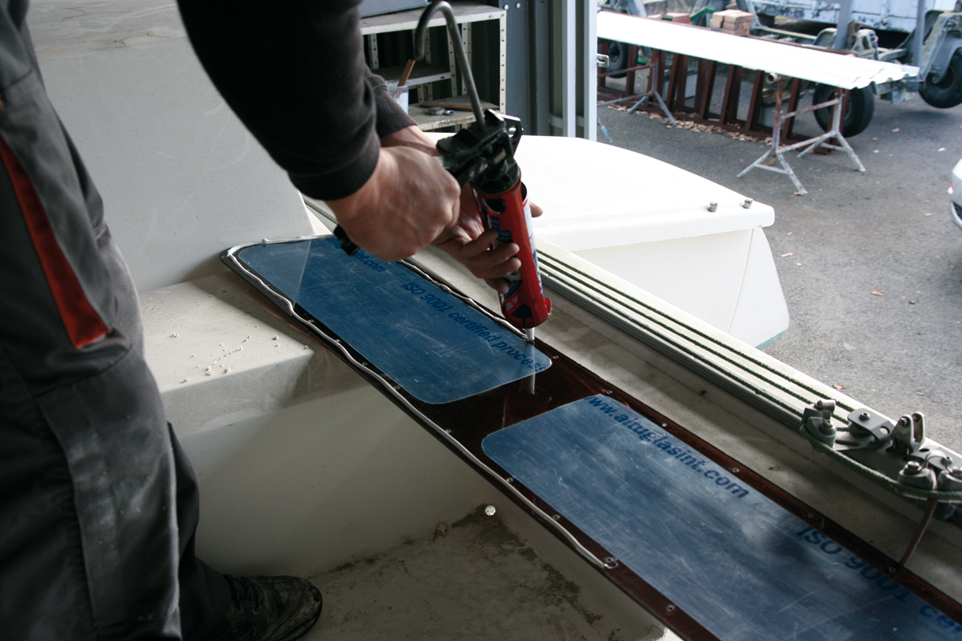
Using your glue cartridge gun, apply a line of polyurethane joint – as evenly as possible – to all the areas of the portlight which will be in contact with the coachroof.
Teamwork: one holds the socket – you might as well align the slots parallel, it’s more attractive - the other fits the bolts from inside. The Perspex must remain level, the guarantee of uniform tightening.

After two to four hours, depending on the temperature, the joint should be dry. Ensure that it has squeezed out all around the portlight: you can then remove the portlight’s protection and the excess joint after running a Stanley knife around it, gently.
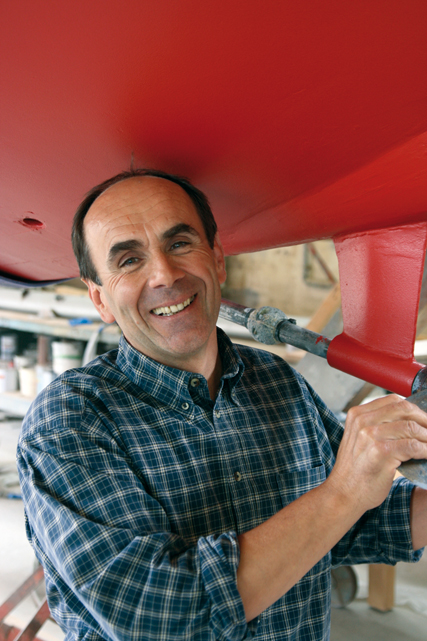
The professional’s opinion Alain Balzeau from Chantiers Hervé
“A safety rule to begin with: never under-size your portlight! If you are replacing 10mm, use 10mm Perspex, or even 12mm, but never 8mm. A portlight is a potential leak in very bad weather, so be careful... We normally work on minimum thicknesses of 3mm for Lexan and 12 to 14mm for Perspex. Obviously, the largest areas require the thickest Perspex. As for the color, there is green, brown, grey, orange... Choose preferably the original color. Beware, the most ‘smoked’ portlights age a little faster.
A few practical tips:
On polyester, I recommend de-greasing with trichloroethylene, not acetone. Then sand with 80/100 grain. Mask the edges well so as not to scratch it. Sand the Perspex also, with 240 grain. For Perspex, be careful with the glues used; certain of them are not compatible, a primer is sometimes recommended. Think about a painted or adhesive strip to protect the joint through the portlight; this will protect it from UV. Outside, rather than removing the surplus joint, I prefer to mask off the surface around the portlight, and make a fillet joint using a drill bit.
My tools:
Clamps, pencil, circular saw, jigsaw. Sander, drill and bits, Stanley knife, assorted screwdrivers, glue cartridge gun.”